
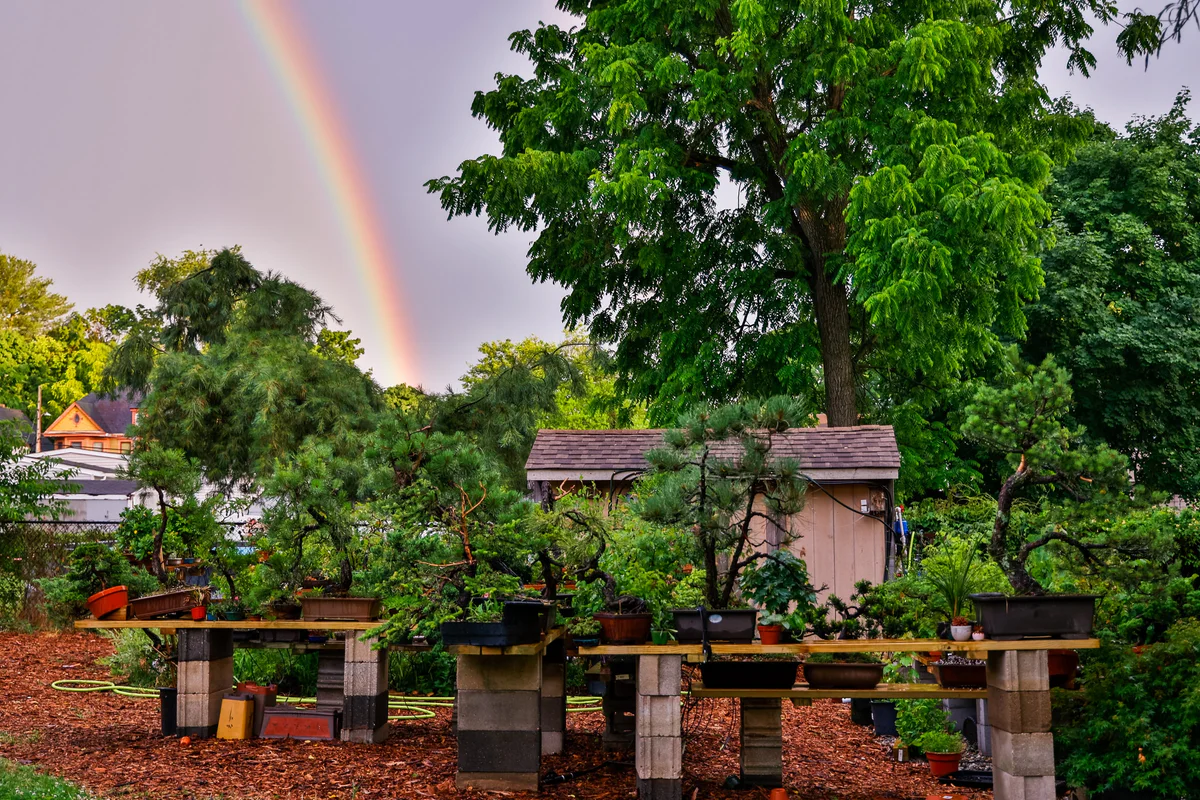
Every bonsai practitioner eventually hears the same advice: don’t water on a schedule.
Check the soil. Lift the pot and feel its weight. Use your finger or a chopstick to check moisture. Water when the tree needs it, not simply because the clock says it’s time.
It’s good advice, and I agree with it.
But it also assumes you’re around when your trees need water.
I have close to 200 bonsai and a 130-mile round-trip commute. My morning drive takes about an hour and fifteen minutes, and the return trip can approach two hours, especially when rush-hour traffic mixes with everyone heading toward the Jersey Shore.
During a New Jersey heat wave, that creates a problem.
I can water before leaving for work, but some of my smaller trees may need water again by mid-afternoon. By the time I get home, they’ve already endured the hottest part of the day.
Driving home during lunch isn’t an option.
So I did what I tend to do when faced with a problem: I started building something.
What began as a cheap lawn sprinkler eventually became a drip irrigation system serving nearly 200 trees, complete with individual emitters, a Wi-Fi timer, and fertilizer injectors.
It has taken years of experimenting, rebuilding, and occasionally questioning my own decisions.
This is how I built it, what I’ve learned, and what I would do differently.
Why I Automated My Watering
There are six of us in my bonsai study group. Five are retired.
Then there’s me.
Their schedules generally allow more flexibility around watering. Mine is built around a full-time job, a long commute, and everything else that comes with everyday life.
But automation isn’t just useful for people who work.
Over the Fourth of July weekend in 2026, my mentor, Karen Harkaway, was away during a heat wave that brought temperatures to approximately 106°F.
Her trees still needed water.
Fortunately, between her pet sitter and her “little protégé,” as I jokingly call myself, we managed to keep everything watered until she returned.
That experience reinforced something I’ve come to believe: eventually, everyone needs help watering.
Eventually, everyone needs help watering.
Vacations, illness, emergencies, and unexpected travel can keep any of us away from our collections.
Automated irrigation can also make bonsai more accessible to people with disabilities, limited mobility, chronic illnesses, or injuries that make daily watering difficult.
For someone who struggles to stand for long periods or handle a hose, automation may be the difference between continuing to enjoy bonsai and having to give it up.
And for beginners worried about leaving their first tree unattended, a reliable backup system can help reduce some of that anxiety.
Automation Isn’t a Replacement for Hand Watering
I want to emphasize something before getting into the technical details.
I still hand-water whenever I can.
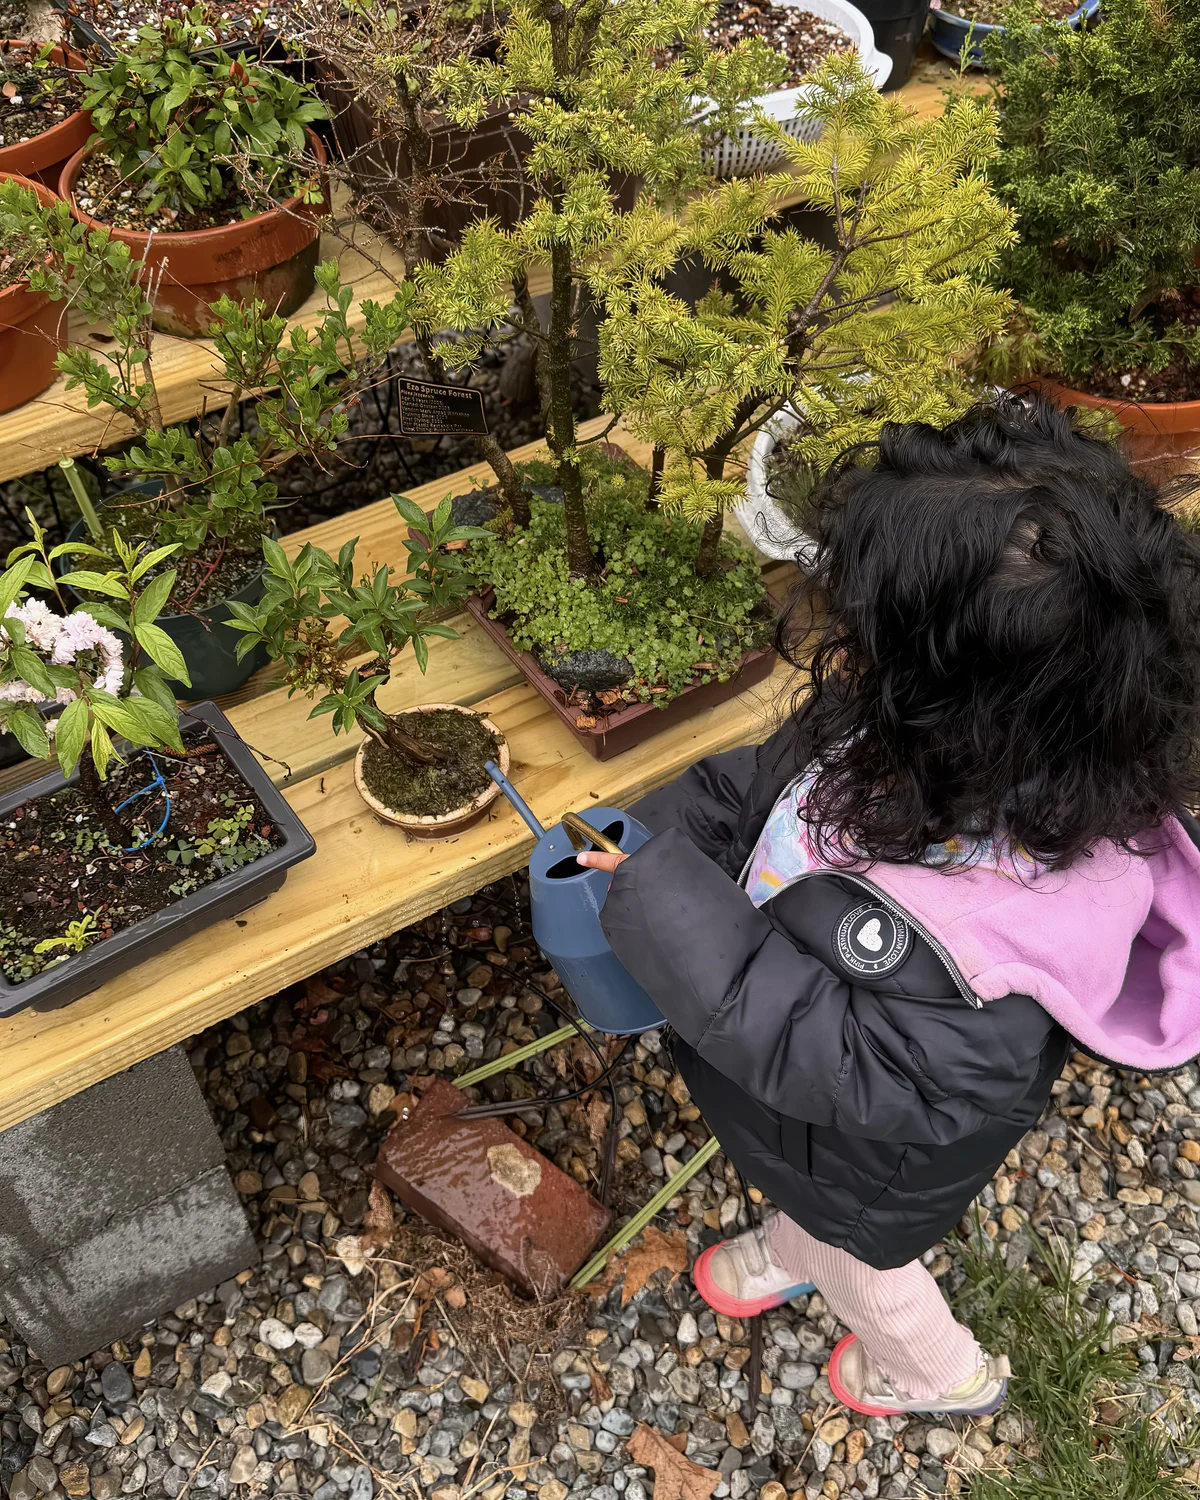
Hand watering is when I notice that a maple isn’t drying as quickly as it normally does, discover pests on a juniper, find a loose wire, or realize a tree needs to be rotated.
A timer cannot observe a tree.
A timer cannot observe a tree.
It doesn’t know whether a tree is healthy, whether the soil is draining properly, or whether a branch has started declining.
My irrigation system isn’t intended to replace those interactions.
It’s there to provide water during the hours when I physically cannot be home.
How My Watering System Evolved
My current setup wasn’t built overnight. It evolved through three different approaches as my collection expanded.
Version 1: The Lawn Sprinkler
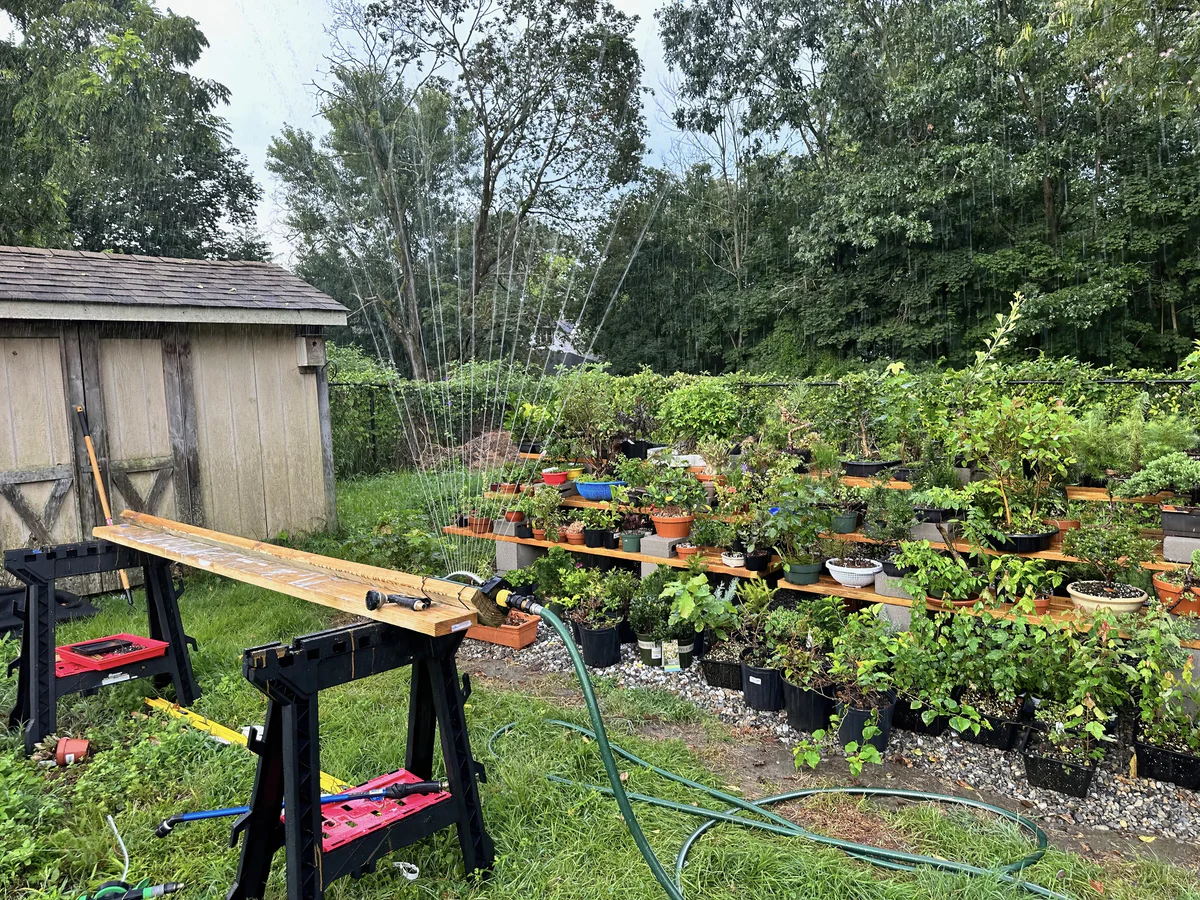
When I had only two benches positioned side by side, I used a standard wide-pattern lawn sprinkler.
It was inexpensive, easy to set up, and worked reasonably well.
Unfortunately, it also watered everything else.
Water landed on the foliage, between pots, and on the surrounding ground. A significant amount never reached the soil.
It worked, but it wasn’t particularly efficient.
Version 2: PVC and Pop-Up Sprinklers
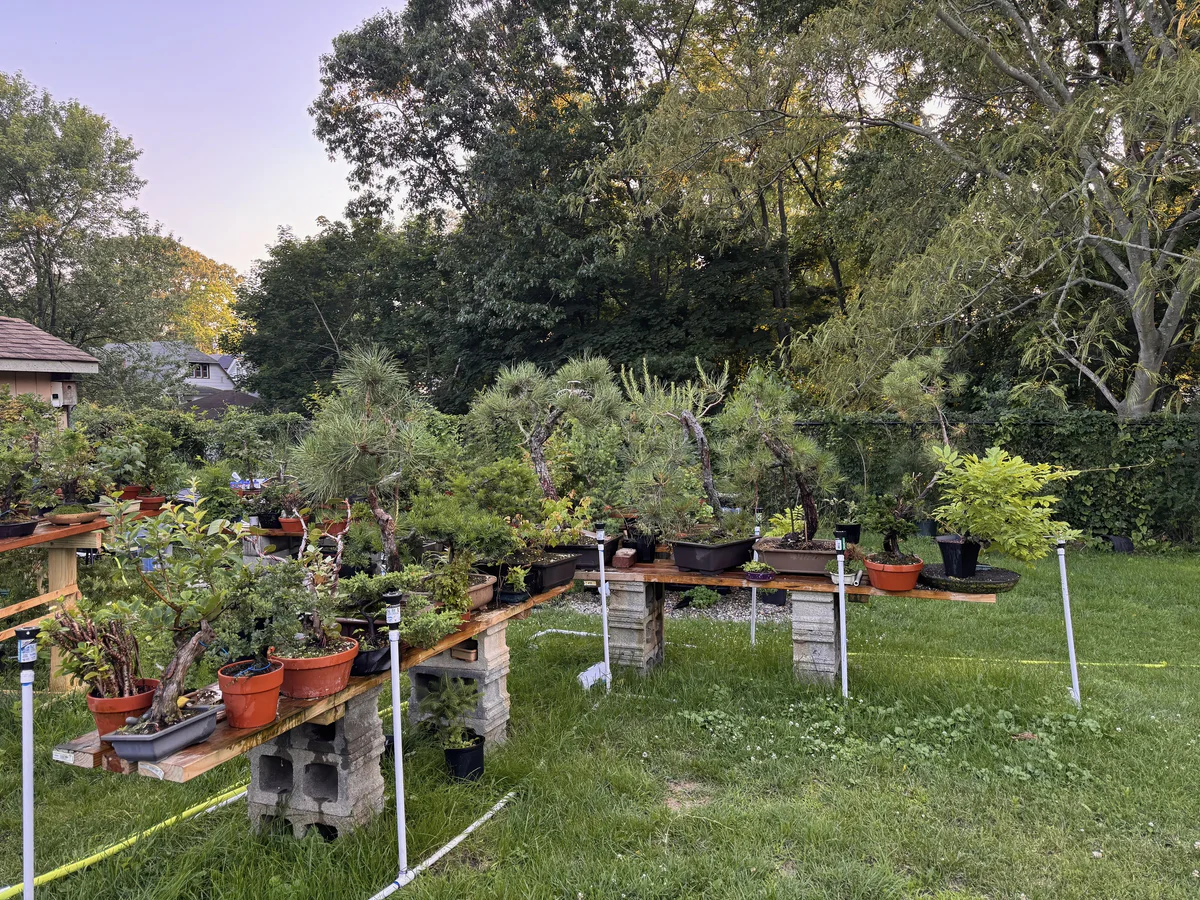
After building two additional benches, I upgraded to pot-height lawn sprinkler heads connected with half-inch PVC.
The sprinkler heads cost around $8–10 each, and the rest of the materials were relatively inexpensive.
The system was straightforward to build using PVC pipe, tees, threaded fittings, a cutter, and glue.
After assembling a few sections, I started feeling like I could probably plumb an entire house.
This was a significant improvement over the original sprinkler. Water was directed toward the pots rather than spraying over the entire collection.
But it still had problems.
Some water landed outside the containers, and the spray occasionally disturbed the surface of the bonsai soil.
The biggest issue was winter.
Despite blowing out the lines with compressed air every autumn, I continued discovering cracked fittings and damaged PVC each spring.
After several years of repairing leaks, I decided to try something different.
Version 3: Drip Irrigation
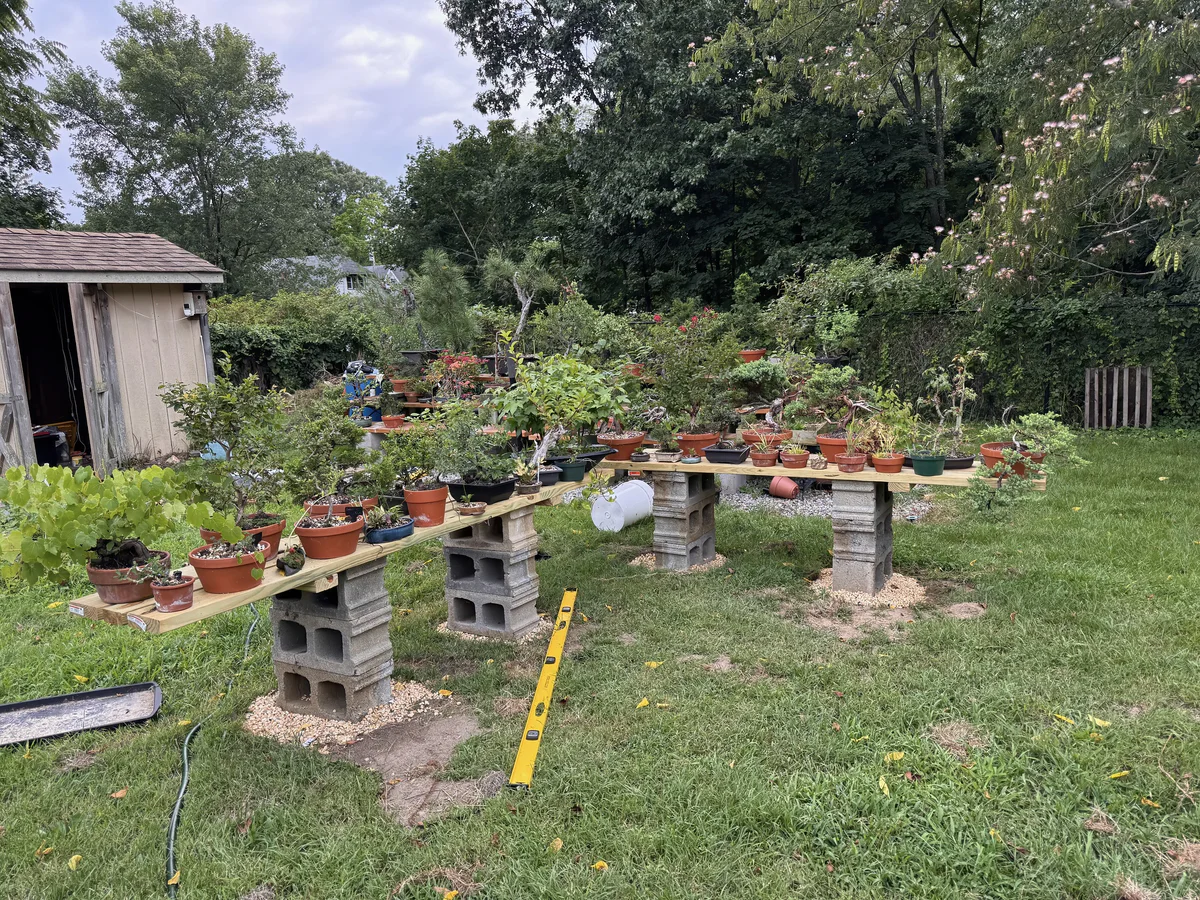
Converting twenty trees to drip irrigation might be a pleasant afternoon project.
Converting nearly 200 is another story.
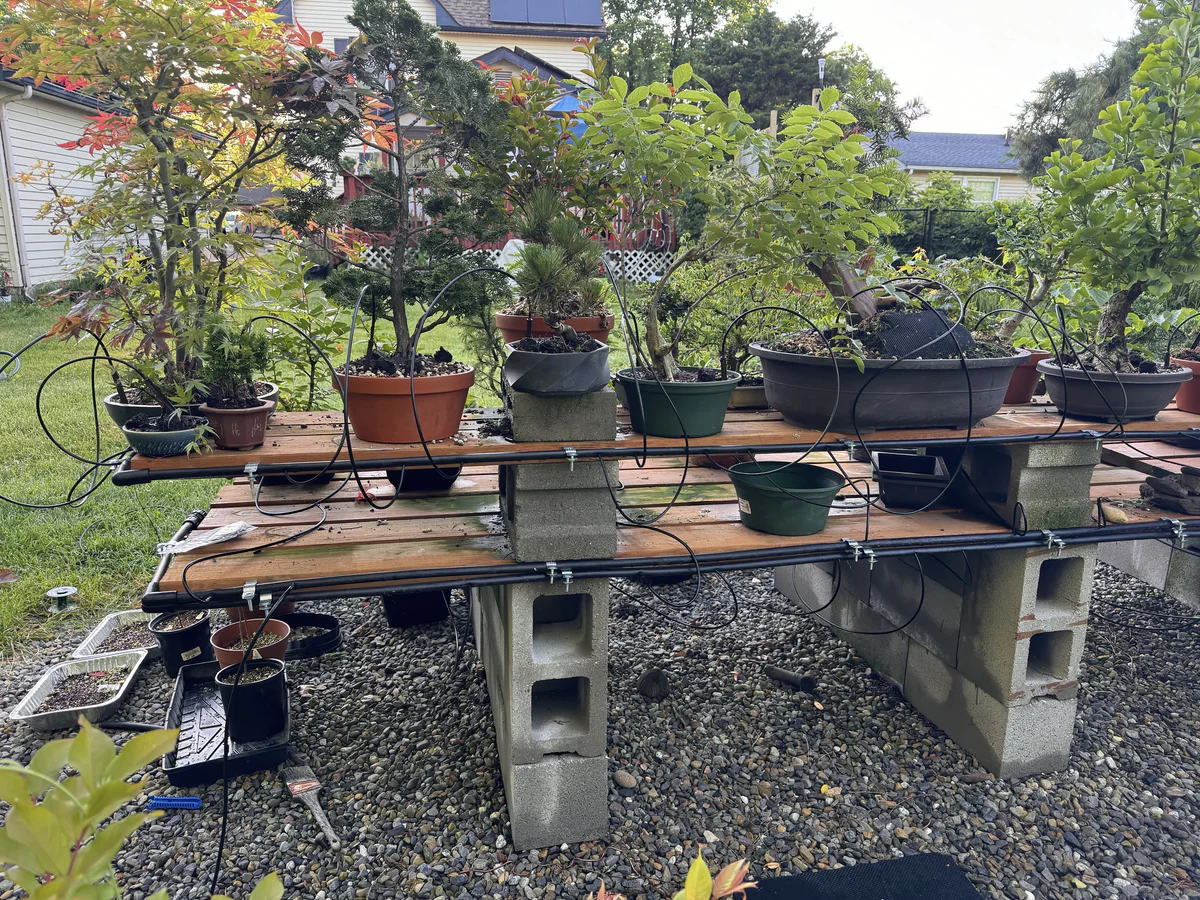
Every tree needed its own distribution line. Larger containers required multiple emitters. Smaller pots needed different arrangements.
The installation was tedious, but the results were worth it.
The new system was more targeted, easier to modify, and significantly more efficient.
It also forced me to confront what I call the tree tax.
Like many bonsai enthusiasts, I bought too many seedlings, nursery plants, and inexpensive trees early in the hobby. Some developed well. Others probably should have been sold or given away years ago.
They all still need water, fertilizer, space, and attention.
Installing individual irrigation lines for nearly 200 trees really drives that point home.
I occasionally found myself wondering whether a particular tree was worth cutting another length of tubing for.
Most of the time, I cut it anyway.
How My Current System Works
The system is fairly straightforward.
At the spigot, a hose splitter sends one line to my watering wand and another to the fertilizer injectors on the shed wall. After the injectors, two Orbit B-hyve Wi-Fi hose timers with four outlets each control watering, and on each outlet the water passes through a filter and a pressure regulator before entering the distribution network.
Half-inch tubing runs along the benches, with one-eighth-inch tubing branching off to individual pots.
The Wi-Fi timers allow me to start or adjust watering remotely, which is particularly useful during unexpected heat waves.
Main Components
| Component | What I Use | Purpose |
|---|---|---|
| Wi-Fi timers | Two Orbit B-hyve 4-port hose timers | Control watering remotely |
| Mainline | 1/2-inch irrigation tubing | Distributes water along benches |
| Distribution tubing | 1/8-inch tubing | Carries water to individual pots |
| Emitters | Primerus Spot Spitters | Directs water across the soil |
| Filter | Inline irrigation filter | Reduces sediment entering the system |
| Pressure regulator | Drip irrigation regulator | Controls operating pressure |
| Fertilizer injectors | Two NEWTRY 1:250–1:25, one for organic and one for chemical fertilizers | Introduce diluted fertilizer |
| Fittings | Twist-and-lock connectors (compression fittings on older sections) | Allow easy modifications |
| Backflow protection | A brass vacuum breaker on the spigot, plastic vacuum breakers on the timer outlets, and the injectors’ check valves | Components of the backflow protection arrangement |
- Spigot
- Brass vacuum breakerOn the spigot
- Hose splitterAlso feeds a hose and watering wand: plain tap water
- Split at the shedAlso feeds a fresh-water outlet
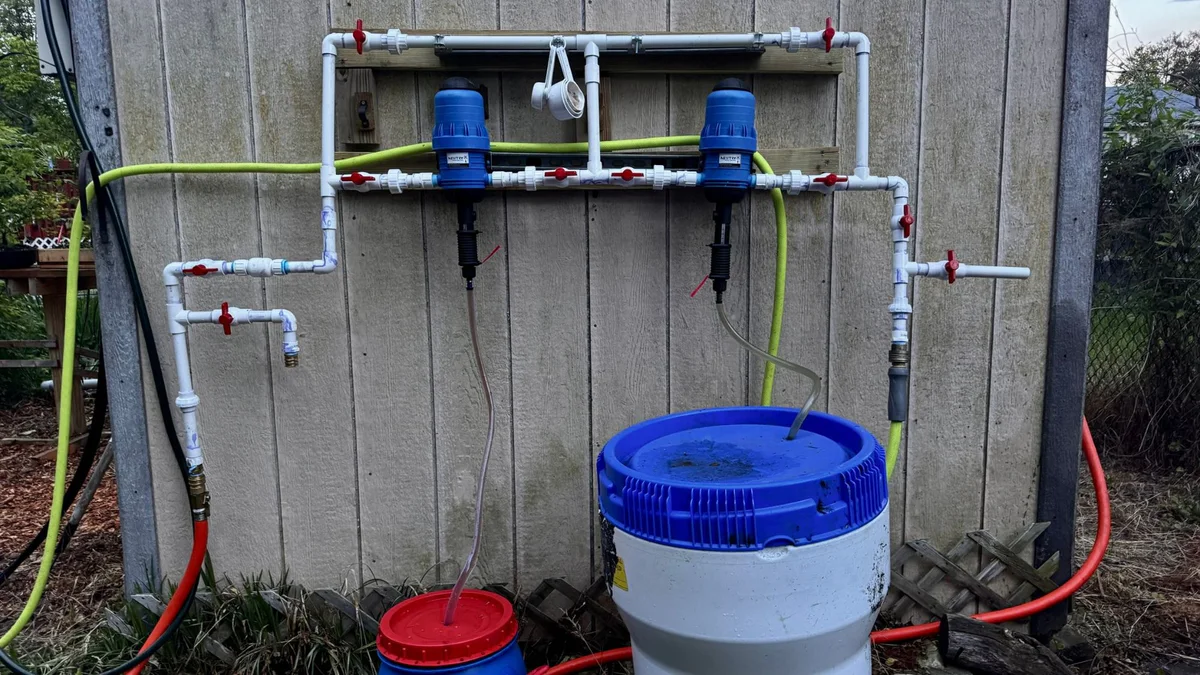
- Fertilizer injectorsNEWTRY · organicNEWTRY · chemicalValves send the water through either one, both, or neither (a bypass pipe skips them)
- Split after the injectorsAlso feeds a second hand-watering hose
- Two Orbit B-hyve timersWi-Fi hose timers, four outlets each
- Plastic vacuum breakersOne on each timer outlet
- FilterOn each outlet
- Pressure regulator25 psi, on each outlet
- ½-inch mainlineAlong the benches
- ⅛-inch distribution tubingTo each pot
- Spot SpittersBrown Mini Flow and light green Low Flow
The exact plumbing configuration and backflow protection requirements depend on the water source, injector, and local regulations. Anyone copying this arrangement should verify the correct installation order and required backflow protection for their equipment.
Why I Like Twist-and-Lock Fittings
One of the biggest advantages of the drip system is how easily it can be modified.
Adding a tree means punching a hole in the mainline and running another distribution tube.
Removing one means plugging the unused connection.
If I rearrange a bench, I can shorten, extend, or reroute tubing without rebuilding an entire section of plumbing.
After dealing with glued PVC for years, that flexibility is a welcome change.
Choosing the Right Emitters
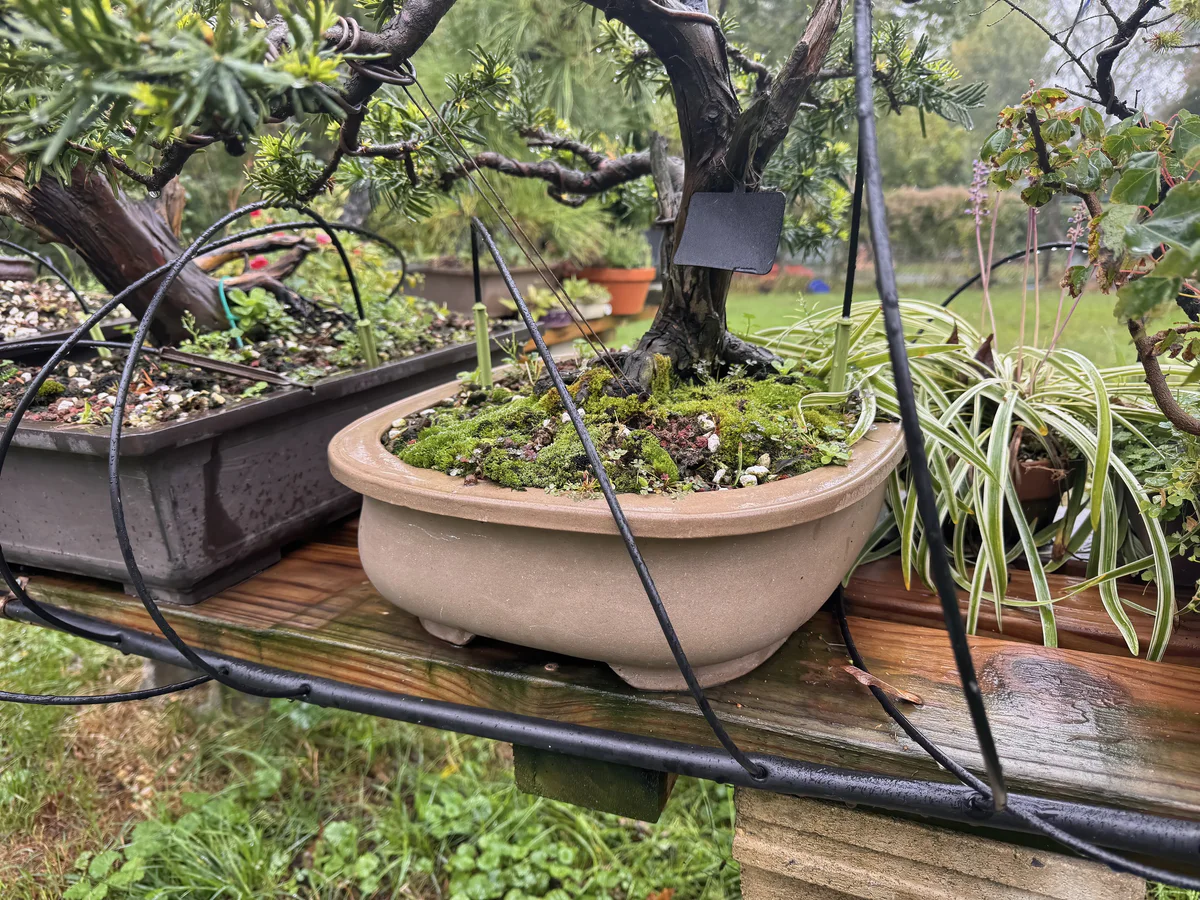
I experimented with several types of irrigation emitters before settling on Primerus Spot Spitters.
I initially tried small spray emitters, followed by bubblers.
Both worked, but neither gave me quite the combination of coverage and simplicity I wanted.
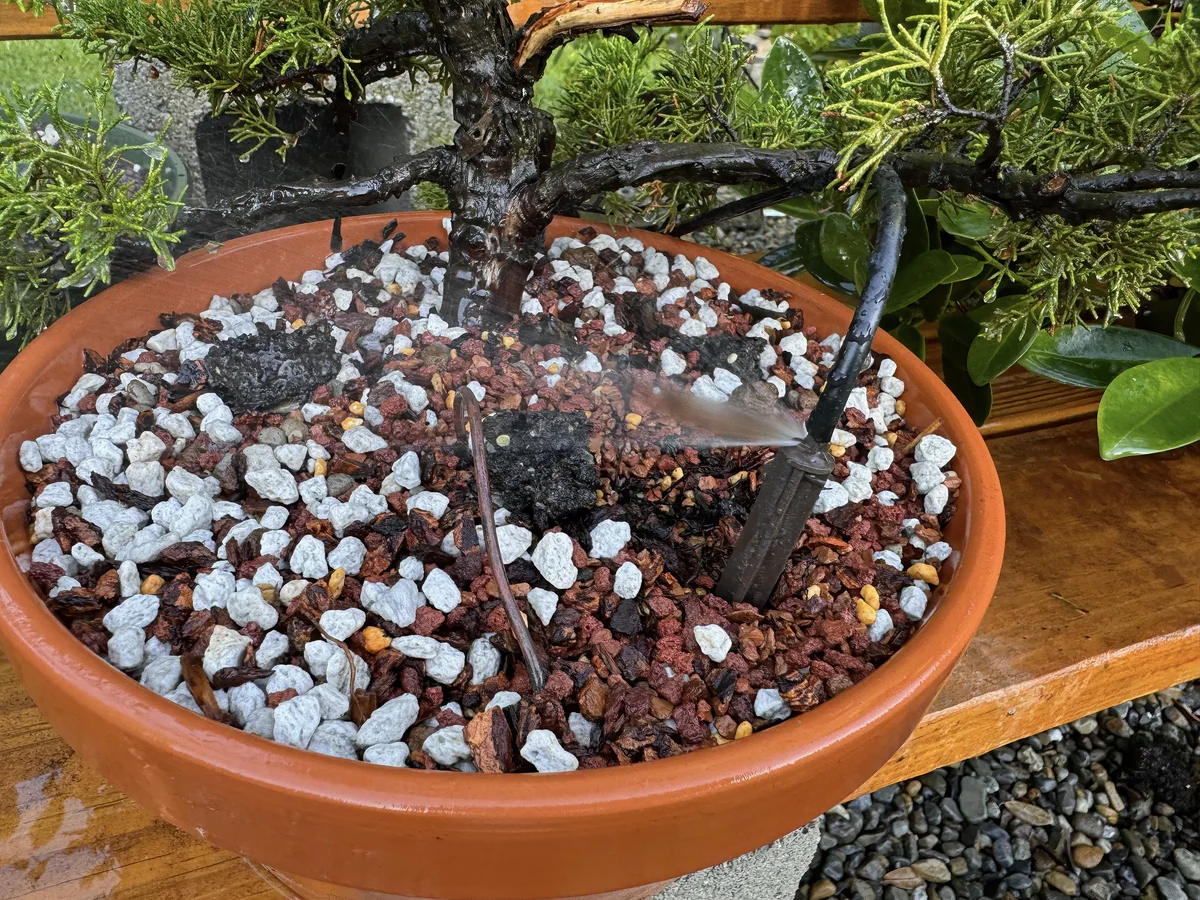
Spot Spitters distribute water across a section of the soil surface rather than delivering it to a single point.
For my collection, they’ve been the most practical solution.
The Two Emitters I Use
| Brown Mini Flow | Light Green Low Flow | |
|---|---|---|
| Flow rate | 7.8 gallons per hour | 7.2 gallons per hour |
| Spray pattern | 90 degrees | 160 degrees |
| Best suited to | Focused coverage near corners and edges | Wider coverage across larger soil surfaces |
I use short and tall configurations depending on the pot and how much clearance is needed above the rim.
These are rated flow figures. Actual output depends on the operating pressure and installation.
How I Arrange Emitters
There isn’t one emitter configuration that works for every tree.
Over time, I’ve developed a few starting points based on pot size and shape.
- Brown Mini Flow, 90° spray
- Light green Low Flow, 160° spray
- Spray carrying past the rim
Two small pots, side by side
One brown emitter in each, facing each other, so each spray also reaches the neighbouring pot
Medium rectangular pot
Two brown emitters at opposite corners, facing inward
Large rectangular pot
Brown emitters at opposite corners, light green along the long sides
Large round pot
Three light green emitters in a triangle, facing inward
Shohin and mame tray
Small pots grouped on a tray, with brown emitters at the corners
Mame, Shohin, and Accent Plants
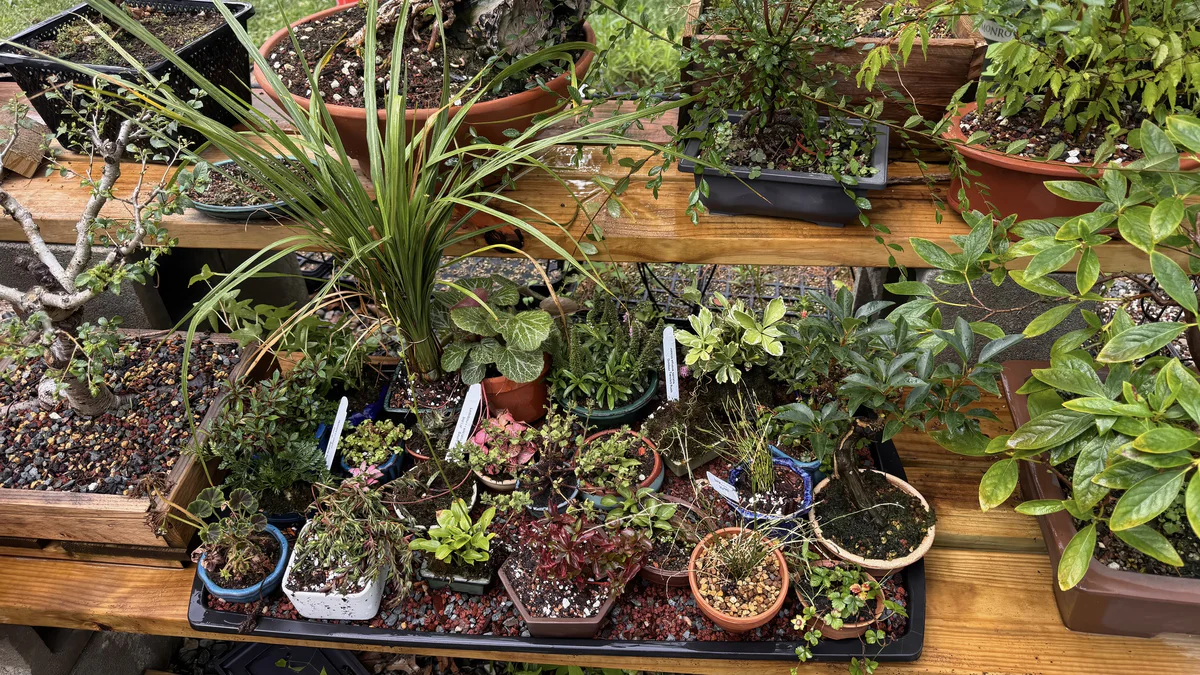
I group smaller trees on large boot trays and position emitters around the corners.
This allows several small pots to be watered together without running a separate line to every container.
I still check individual pots to ensure they’re receiving enough water, and I avoid allowing them to remain in standing water unnecessarily.
Small and Medium Trees
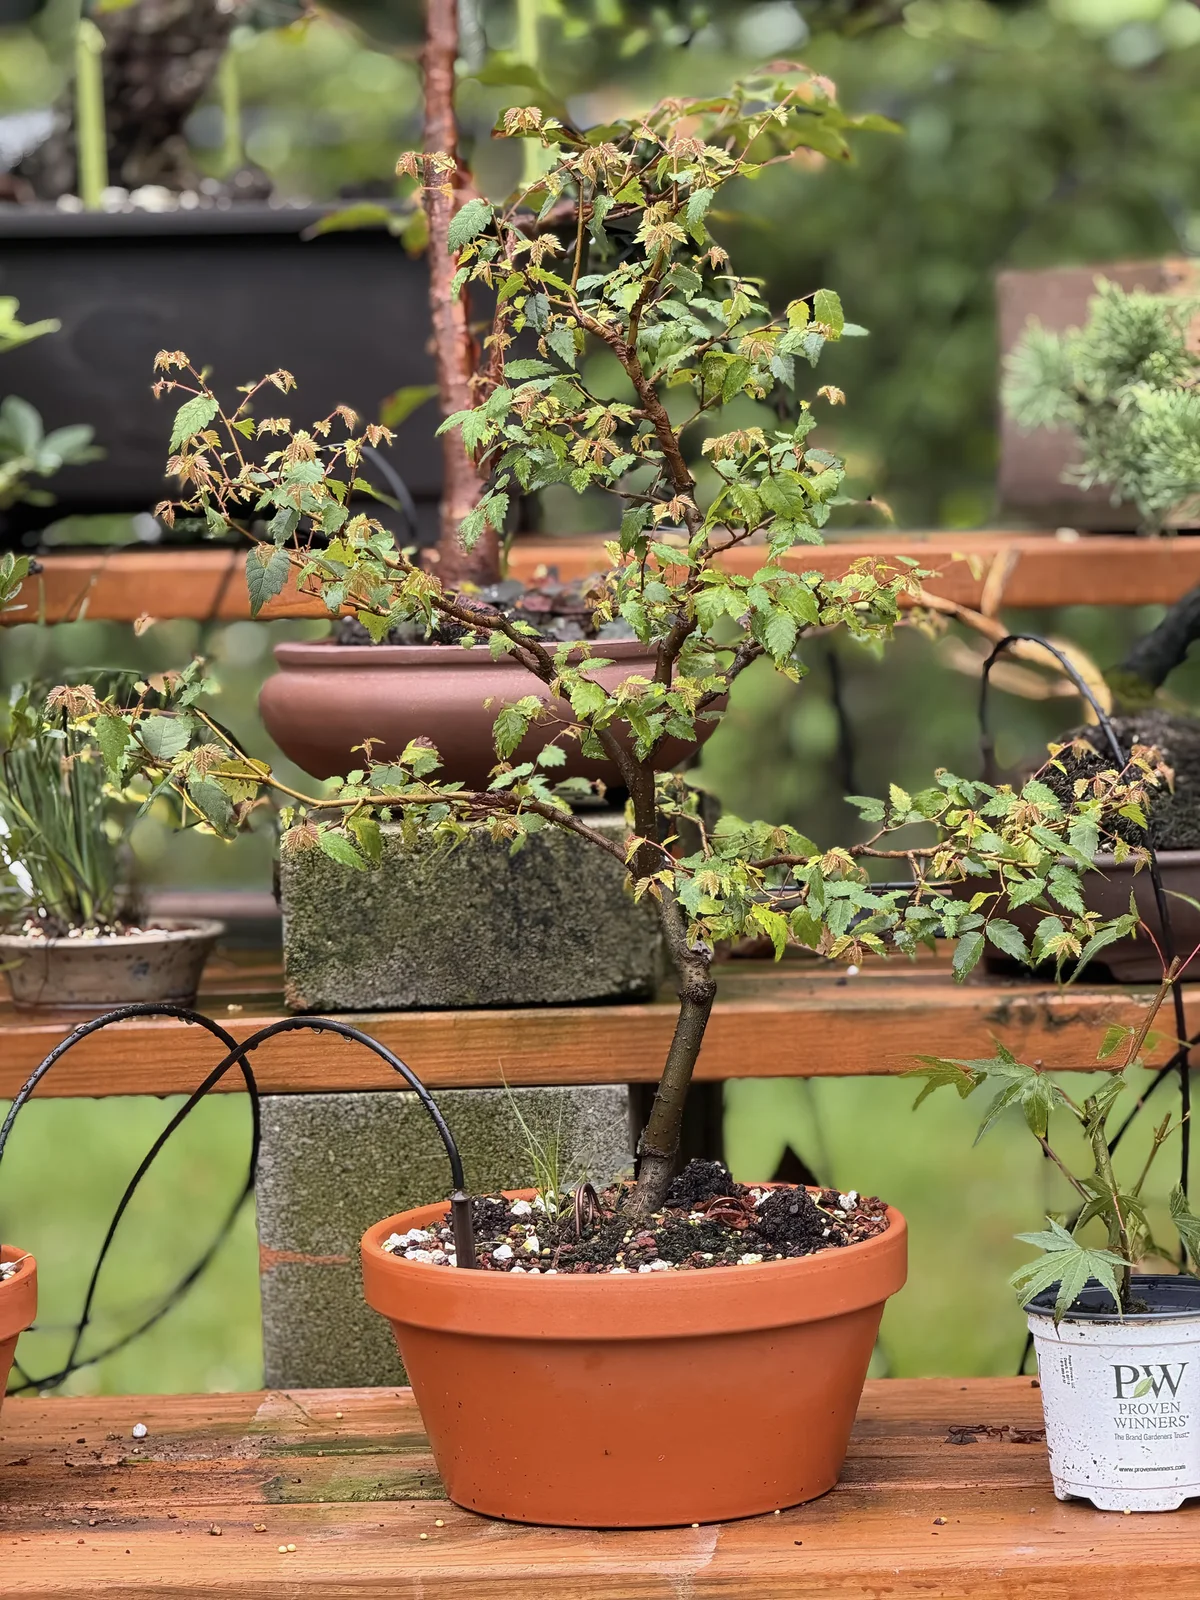
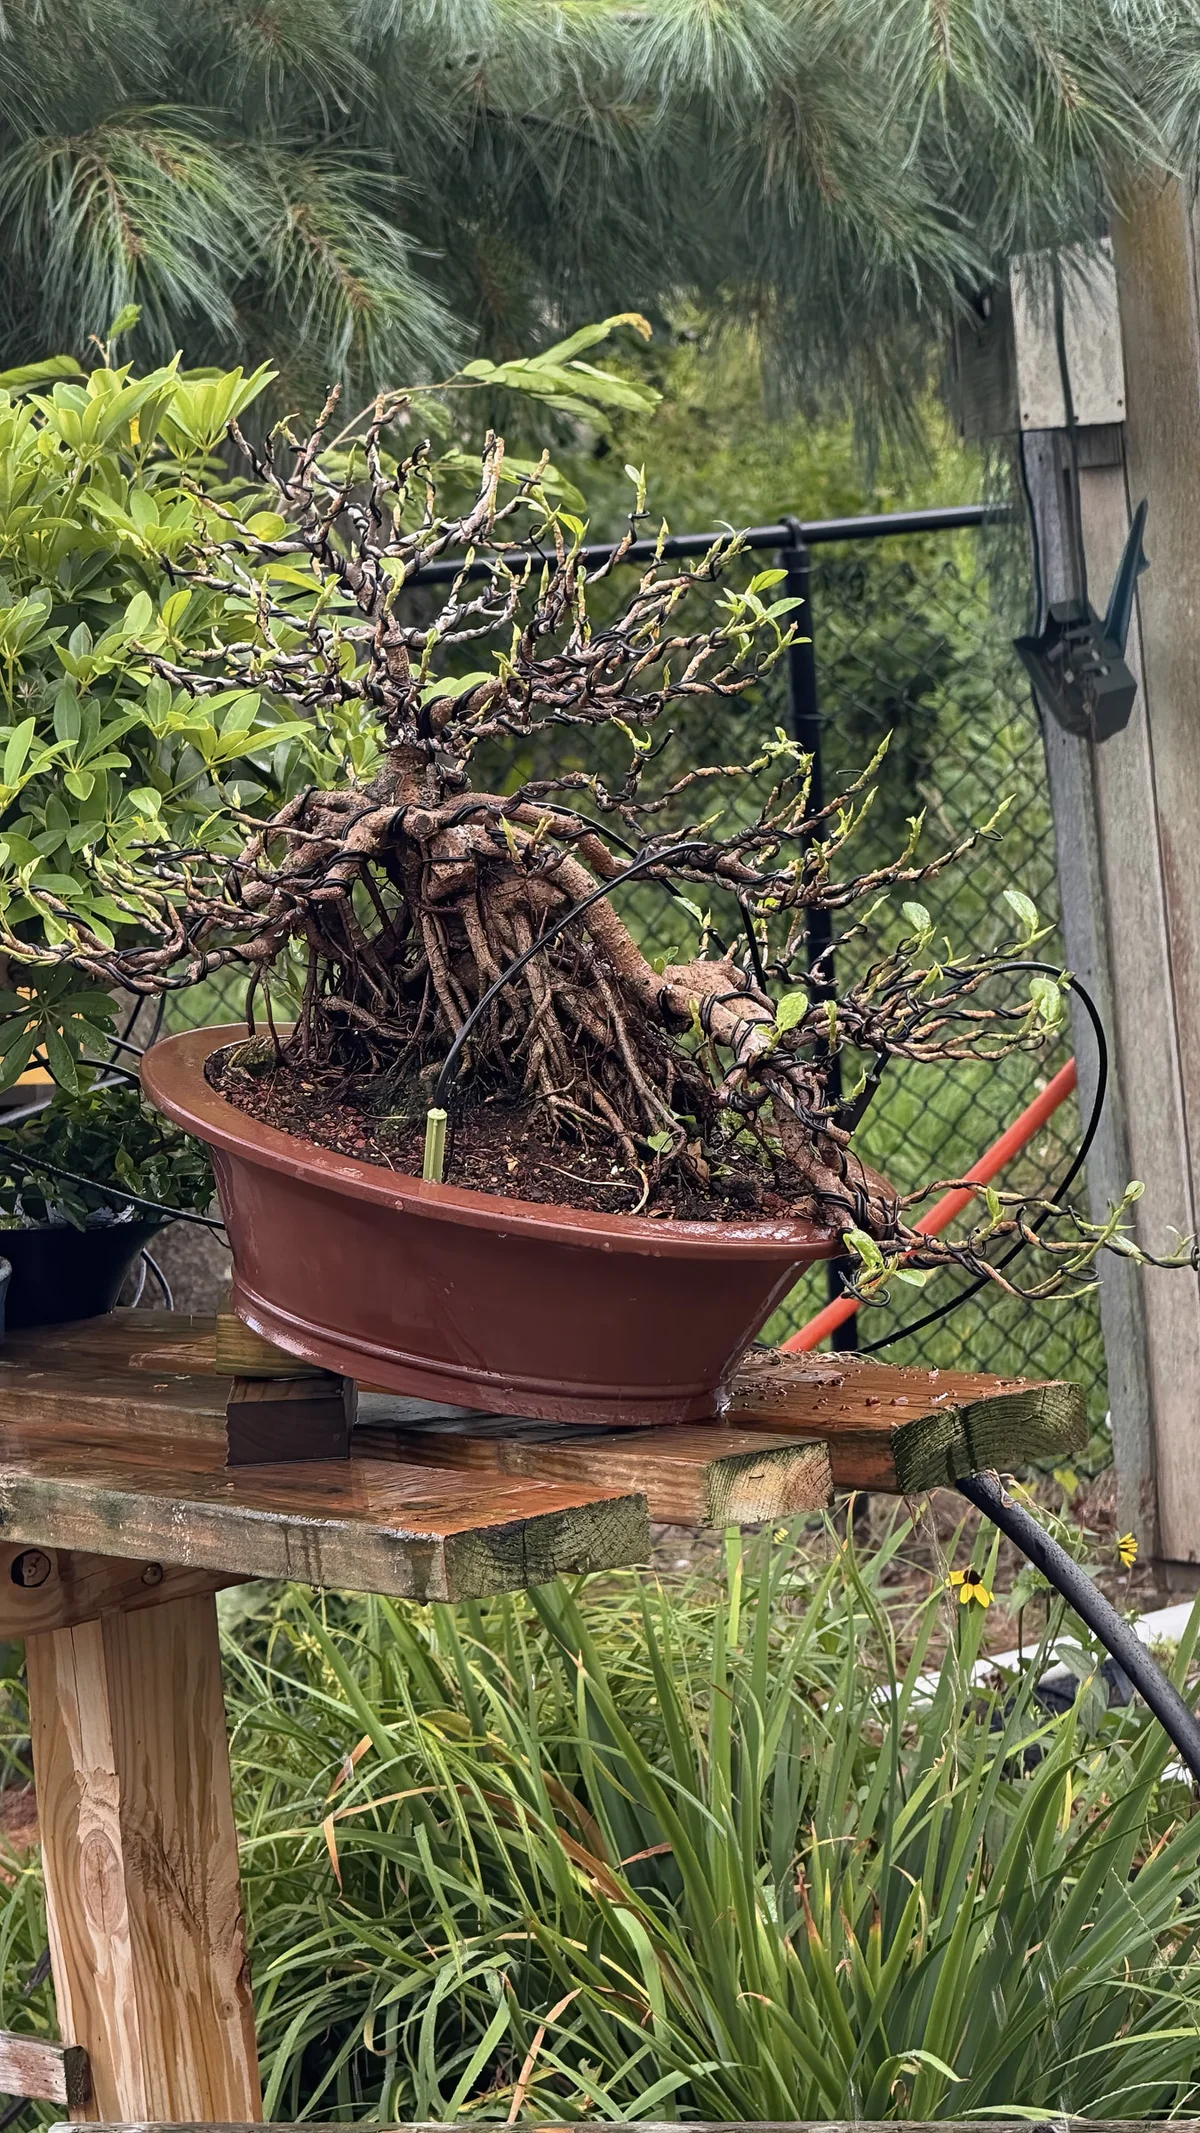
Most small and medium trees receive a single emitter.
For two small pots positioned close together, I sometimes place an emitter in each pot and orient them inward.
Medium and Large Trees
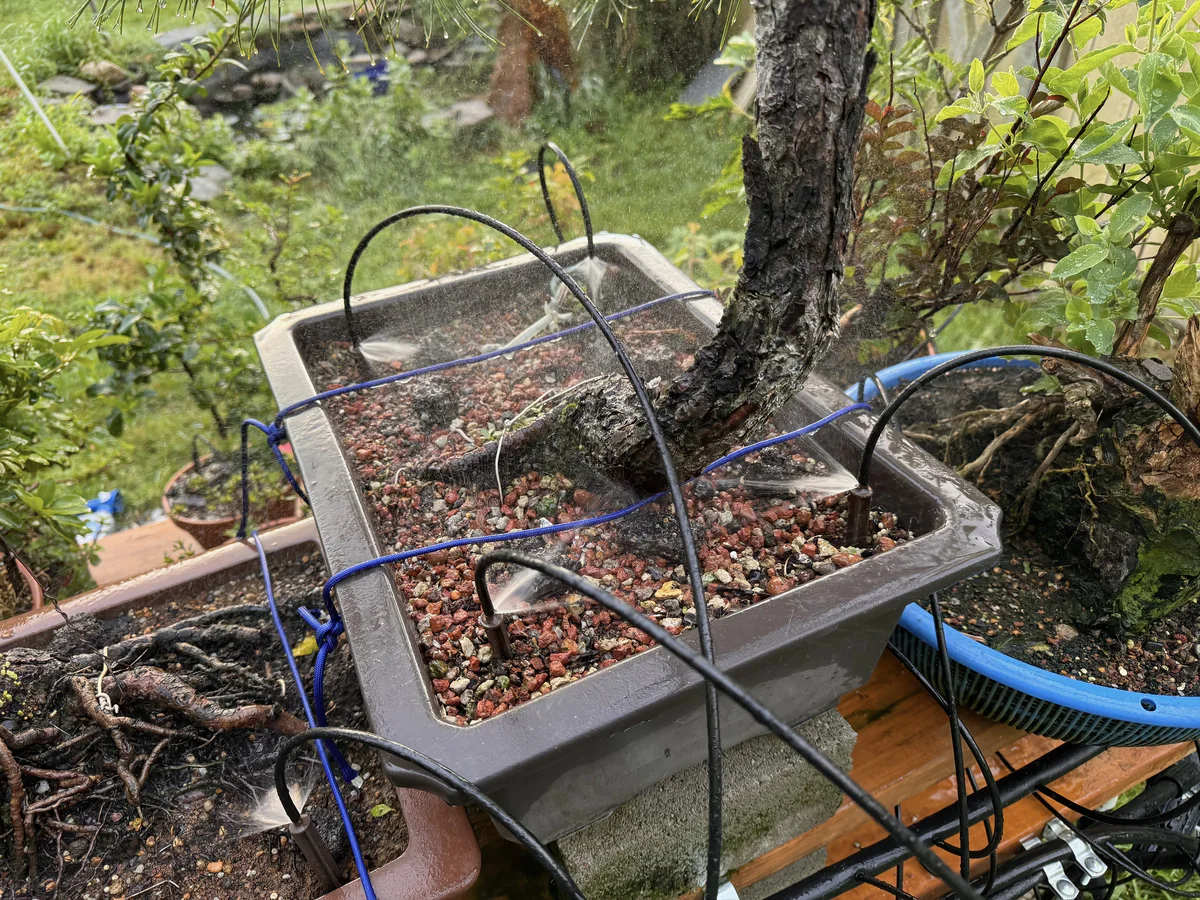
For medium to large rectangular pots, I typically use two brown 90-degree emitters positioned at opposite corners.
This helps distribute water across the soil while limiting overspray.
Large Containers
My largest pots generally receive four emitters.
Two brown emitters cover opposite corners, while two light green emitters provide wider coverage along the longer sides.
For a large round pot, I use three light green emitters arranged in a triangle.
I also stagger the heights slightly because I prefer that the streams don’t collide in midair.
Whether that actually improves distribution or just satisfies my engineering instincts remains debatable.
These configurations are starting points, not fixed rules.
I adjust the number and placement of emitters based on how each pot responds.
Fertigation: Feeding Through the Irrigation System
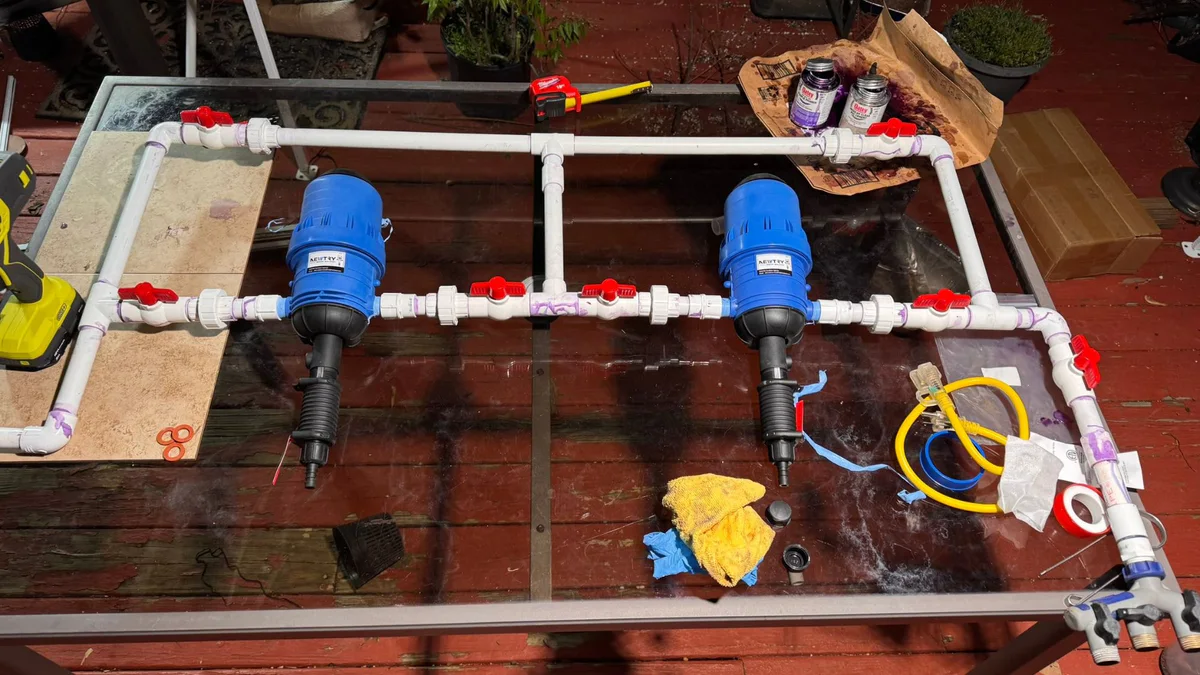
Another addition to the system is a pair of NEWTRY fertilizer injectors, each with an adjustable dilution range of 1:250 to 1:25. I use one for organic fertilizers and one for chemical fertilizers, and valves let me send the water through either one, both, or neither.
This allows me to introduce a diluted fertilizer solution into the irrigation water.
The process is called fertigation.
Instead of relying entirely on occasional stronger fertilizer applications, I can deliver smaller amounts more frequently.
With nearly 200 trees, this has made fertilizing much easier to manage.
I still adjust feeding according to the season, the condition of the trees, and their development goals.
A refined tree being maintained for exhibition doesn’t necessarily need the same feeding approach as a young tree I’m trying to grow aggressively.
The injectors simply give me another way to manage fertilization consistently.
How Much Water Am I Saving?
One of the most encouraging results has been the reduction in water consumption.
I use a Flume water monitor to track household water usage, which allowed me to compare hand watering with the drip system.
Water Used Per Watering Cycle
Hand watering
Current drip system
About 30 gallons less per cycle, a reduction of roughly 33%
That’s roughly thirty gallons saved per watering cycle.
These are observations from my own collection rather than a controlled comparison, but the difference has been substantial.
More importantly, the water is being delivered directly to the pots instead of soaking the ground around them.
Less overspray also means less fertilizer ending up where it isn’t needed.
Of course, reducing water consumption is only worthwhile if every tree is still receiving enough.
I continue checking soil moisture and adjusting emitters as necessary.
The Problem With Watering on a Schedule
This is probably the biggest limitation of automated bonsai irrigation.
A timer doesn’t know whether a tree needs water.
A pine in a deep pot may remain moist long after a maple in a shallow pot has dried out.
A tree in full sun may need considerably more water than one in afternoon shade.
Even two trees of the same species can behave differently depending on pot size, soil composition, root development, and exposure.
My current approach is to adjust watering at the individual pot using different emitter configurations.
If a tree dries too quickly, I can add another emitter. If it stays wet too long, I can reduce the amount of water delivered.
Future Improvement: Multiple Watering Zones
Eventually, I’d like to divide the collection into separate irrigation zones.
This approach, sometimes called hydro-zoning, groups plants according to similar watering requirements.
For example, I could create separate zones for:
- Small, fast-drying pots
- Deciduous trees with higher water demand
- Conifers and slower-drying containers
- Tropical trees
- Benches receiving different amounts of sunlight
Each zone could have its own watering duration and schedule.
I haven’t implemented this fully yet, but it’s one of the improvements I’m most interested in.
Even with multiple zones, the system would still require observation and adjustment.
Testing the System
I strongly recommend testing any new irrigation system for at least a week before depending on it.
Don’t install everything on Friday and leave for vacation Saturday morning.
During testing, I look for several things.
- Leaks: Check every fitting and connection while the system is running.
- Pressure: Make sure emitters at the far ends of the benches receive adequate flow.
- Coverage: Confirm that water reaches the entire soil surface where needed.
- Penetration: Check that water is reaching the root mass rather than simply running through channels and draining out.
- Clogs: Inspect emitters for sediment or debris.
- Runoff: Watch for water flowing over the rim instead of entering the soil.
- Reliability: Confirm that the timer operates correctly and that the system can complete a cycle without intervention.
I also recommend having someone check the collection during longer absences.
Automation can handle much of the watering, but it cannot necessarily recognize a broken fitting, disconnected hose, or tree that has fallen off a bench.
Maintenance and Winterizing
The drip system requires less repair work than my previous PVC setup, but it isn’t maintenance-free.
Filters need cleaning, emitters need inspecting, and tubing occasionally needs replacing.
I keep spare fittings, plugs, tubing, and emitters available so minor repairs don’t become major projects.
Winterizing is particularly important here in New Jersey.
I built the PVC injector manifold with unions, so I can take it apart and store it safely for the winter.
Before freezing weather arrives, I disconnect and drain the timers, injectors, filters, and regulators as appropriate. I also drain the irrigation lines and take precautions against water becoming trapped in fittings.
After years of repairing cracked PVC every spring, I’ve learned not to underestimate winter.
What’s Next?
The system works well, but I have several improvements planned.
- Larger supply line: I’d like to upgrade portions of the supply plumbing to three-quarter-inch PVC to reduce pressure loss and support future expansion.
- Quick-disconnect fittings: These would make seasonal removal and maintenance easier.
- Dedicated irrigation controller: Eventually, I’d like to replace the hose timers with a controller operating multiple solenoid valves.
- Independent zones: Separate watering schedules would make it easier to accommodate different groups of trees.
I’m also interested in exploring moisture monitoring, although I haven’t decided how useful individual sensors would be across a collection with so many different species and pot sizes.
The goal is to make the system more reliable without making it unnecessarily complicated.
After all, the reason I built it was to save time.
Final Thoughts
This isn’t the only way to automate bonsai watering.
It’s simply the system I’ve developed through several years of experimentation, mistakes, and improvements.
Someone with twenty trees probably doesn’t need the same setup as someone with two hundred. A grower in Arizona faces different challenges from someone in New Jersey.
The important thing is finding an approach that works for your collection and your circumstances.
I also don’t think automation should be viewed as a lack of dedication.
Someone working long hours, managing a disability, caring for family members, or simply taking a vacation shouldn’t have to choose between those responsibilities and keeping bonsai.
At the same time, a timer doesn’t eliminate the responsibility to understand and care for our trees.
I still enjoy walking through the collection with a watering wand. Sometimes I’ll notice a new bud, a branch that needs wiring, or a tree that has developed differently than I expected.
Those moments are part of why I enjoy bonsai.
I don’t want to automate them away.
What I want is the peace of mind that comes from knowing my trees can receive water during the hours when I cannot be there.
The timer delivers the water.
The responsibility for the trees is still mine.
And when I’m home, I’ll still be the one reaching for the hose.
Parts List
Parts with an item number came from Drip Depot. Updated .
Supply and backflow
Fertilizer injection
NEWTRY · Adjustable dilution, 1:250 to 1:25
One for organic fertilizers, one for chemical fertilizers
EPHECH · ¾-inch, Schedule 40, slip socket, red T-handle
Send the water through either injector, both, or neither
¾-inch, Schedule 40, slip socket, EPDM O-ring
Let the injector manifold come apart for winter storage
Timers, filters and regulators
B-hyve 4-port Wi-Fi hose timer × 2 (8 outlets)
Orbit · model 24639
Schedules and starts watering remotely
High Flow Y-Filter
Irritec · ¾-inch garden hose thread
Reduces sediment entering the drip lines
Drip Depot item 1025
PRLG Low-Flow Landscape Grade pressure regulator
Senninger · 25 psi, ¾-inch garden hose thread
Brings house pressure down to drip pressure
Drip Depot item 3523
Tubing and fittings
½-inch polyethylene tubing
0.600-inch inside, 0.700-inch outside diameter
Mainline along the benches
⅛-inch polyethylene tubing
0.125-inch inside, 0.185-inch outside diameter
Distribution lines to each pot
Drip Depot item 4762
Perma-Loc tubing adapter
Irritec · ½-inch tubing to ¾-inch female hose thread swivel
Connects the mainline to the hose fittings
Drip Depot item 1193
Twist-N-Lok reusable tubing coupler and tee
½-inch tubing
Joins and branches the mainline
Perma-Loc tubing elbow and end cap
Irritec · ½-inch tubing
Turns corners and closes the ends of the mainline
Compression tubing coupler, tee and elbow
0.700-inch outside diameter tubing
Joins and branches the mainline
Older connections, still in line. New connections are twist-and-lock.
Emitters and tools
Spot Spitter, brown Mini Flow
Primerus · 90-degree pattern, 7.8 gallons per hour
Focused coverage near corners and edges
Drip Depot item 2280
Spot Spitter, light green Low Flow
Primerus · 160-degree pattern, 7.2 gallons per hour
Wider coverage across larger soil surfaces
Drip Depot item 2278
⅛-inch punch
Primerus
Punches holes in the mainline for distribution lines
Drip Depot item 2532